
PUP.Optional.PushNotifications
ThreatDown is now the name of the Malwarebytes line of business products. References to Malwarebytes below reflect the amazing technology used to first identify the threat.
Short bio
PUP.Optional.PushNotifications is Malwarebytes’ detection name for a large collection of domains that deploy malicious or fraudulent web push notifications on Chromium based browsers.
Type of infection
Web push notifications are displayed in the lower right corner of the desktop even if the browser is minimized or closed. Websites use social engineering to trick users into allowing web push notifications from their domain, but most of them will show a prompt similar to this one:

Once the user has allowed the notifications the settings can be reviewed and changed under Settings > Advanced > Privacy and Security > Site settings > Notifications.

Malicious behavior
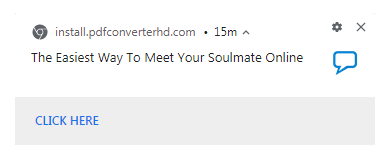
web push notification delivered by pdfconverterhd.com
Protection
PUP.Optional.PushNotifications is a detection-only rule, but both Malwarebytes Browser Guard and Malwarebytes Premium will protect you from the sites that ask you to allow these web push notifications.”>


Home remediation
Malwarebytes can detect and remove PUP.Optional.PushNotifications without further user interaction.
- Please download Malwarebytes to your desktop.
- Double-click MBSetup.exe and follow the prompts to install the program.
- When your Malwarebytes for Windows installation completes, the program opens to the Welcome to Malwarebytes screen.
- Click on the Get started button.
- Click Scan to start a Threat Scan.
- Click Quarantine to remove the found threats.
- Reboot the system if prompted to complete the removal process.
Malwarebytes will move the domain from the Allow section to the Block section.”>
Add an exclusion
Should users wish to keep this program and exclude it from being detected in future scans, they can add the program to the exclusions list. Here’s how to do it.
- Open Malwarebytes for Windows.
- Click the Detection History
- Click the Allow List
- To add an item to the Allow List, click Add.
- Select the exclusion type Allow a file or folder and use the Select a folder button to select the main folder for the software that you wish to keep.
- Repeat this for any secondary files or folder(s) that belong to the software.
If you want to allow the program to connect to the Internet, for example to fetch updates, also add an exclusion of the type Allow an application to connect to the internet and use the Browse button to select the file you wish to grant access.